I’m a gadget and DIY junky with a knack for futzing and tinkering. 3D printing is right up my alley. It wasn’t on my radar until other members of the Mobile Makerspace were continually talking about printing. I spent hours binging on 3D printing articles, blogs, and forums. My plan was to start with a small inexpensive printer such as the Printbot Jr. I would use this printer to create parts for a RepRap. The result would be two printers for less than the price of a MakerBot or Ultimaker. My wife convinced me to just buy a more turnkey printer that met my needs versus working my way up. The suggestion to get the best tool you call afford saved me a lot of pain in hindsight.
Early August I ordered an Ultimaker kit. It arrives boxed in a stack of flat packed layers reminding me of Ikea. The plywood laser cut frame, motors, rods, and bearing are a thing of beauty to my eyes. I felt intimidated by the assembly process. This feeling was after having spent hours studying the instructions online. It took roughly 14 hours split over 2 days to assemble before I was ready to attempt my first calibration and print.
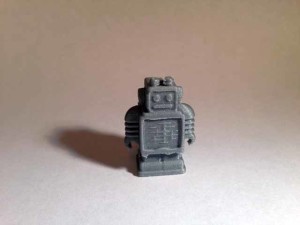
The calibration process involves verifying communication between the printer and the controlling software. It heats up the printing element and verifies temperature control. The software then attempts to level the print bed. This is were the fun began. The print head is moved to each of the corners of the print bed while you adjust the bed height. Once leveled, a bead of material is printed around the perimeter of the bed. My perimeter was no where close to being the full size of the print bed. It seemed to change each time I retried the calibration. Ignoring the obvious signs of misadjustment I decide to do my first print, the Ultimaker robot.
My wife, sister, and brother-in-law gather around to witness the first print. The head dutifully moves around print bed and plastic is extruded onto the platform. The initial shape is slightly recognizable as a rectangle. Several sub-millimeter layers later the shape became unrecognizable. I stopped the print acceptingthe fact that this is not a robot. First print failed.
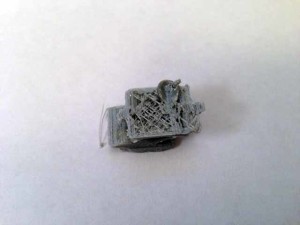
The print head is moving and extruding, but one of the axis is obviously messed up. Looking at the print each layer is shifting. Determined the problem was on the x-axis. Traced the belts that control the x-axis they felt tight. The suggestion for ‘tight belts’ is repeated over and over in forums and in the instructions, but it’s subjective. I undid the belt clamp and reassembled. I went over every screw I could find. I check the pulleys that move the belts and they seem OK. During all of this I’m redoing the initial calibration with Cura so it’s attempting to print a border around the print bed. Finally we spot the problem. The pulley on the x-axis stepper motor was slipping on its shaft every once and awhile. Tightened it down and we get a full perimeter boarder. It made sense later on given the problem with the print and having a better understanding of the mechanics. My brains were mush after having just finished assembly.
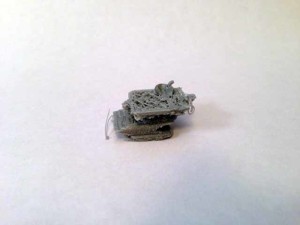
The second attempt at printing the Ultimaker robot looks great. In fact it’s an incredible feeling having spent so much time in assembly to see something recognizable. I walked away from my laptop long enough for it to hibernate or sleep. The laptop napped and so did the printer. The result is a 225 degree Celcius hunk of metal melting in to the lower half of the robot. I disabled all the power saving sleep settings and gave it another chance. 
My advice is to set really low expectations. This is an early technology. It is going to fail. You will have to tinker. You will spend a lot of time doing adjustments. I wouldn’t be surprised to spend more time futzing with the printer than actually printing. Build your printer from a kit. You will be miserable and frustrated If you buy the printer assembled and expect it to work like a household appliance. Building from a kit will give you a better understanding of the mechanics. Things do get better.