Getting Started with ShapeOko2
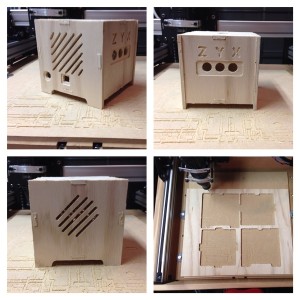
My first project on the new ShapeOko2 was an electronics enclosure for the gShield controller. The CNC electronics is a Arduino with a gShield shield for controller the stepper motors. I’d gone through the basic projects on the wiki and decided it was time to make something useful – a box.
The workflow I’m using is to design in Inkscape, generate the gcode in makercam and then send the gcode via Universal GCode Sender to the controller. Working in Inkscape is familiar territory for drawing vectors. A couple tips I picked up:
- Immediately set your units to inches. It’s painful, but with this workflow it saves the trouble of post processing gcode.
- Edit the document properties to match your work area.
- 0,0 is the bottom left.
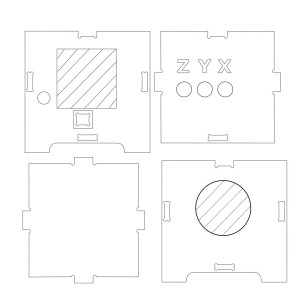
I started by creating a cheat sheet with joinery pieces in a separate document. The intent was to keep this for later use as known good joints. It was useful later when I churned through iterations. Once I had the panel shapes I moved on to the cutouts for cable connections and buttons. Keep in mind that screw mount items might not fit with the thickness of the material. I discovered this in early small iterations. Note the inside corners are little dog bones or overrun. This is because you can’t cut a square inside corner.
Using makercam becomes methodical after a few iterations with a bunch of pockets and profiles. Set your DPI to 90. Be absolutely sure you set your DPI each time you start a new document in makercam when you’re importing the SVG file from Inkscape. Otherwise your dimensions will be off. I did a lot of testing in early iterations to get my cutting parameters to something reasonable. I still believe I’m cutting too slow since I ended up with a lot of furry edges.
I used 1/4″ birch plywood cut with the standard Shapeoko2 spindle using the 2 flute endmill. The toolpath settings were:
- 0.125″ 2 flute end mill
- spindle at max 30k RPM
- step down 0.03in
- feed rate 25 in/min
- plunge rate 10 in/min
Features & Parts:
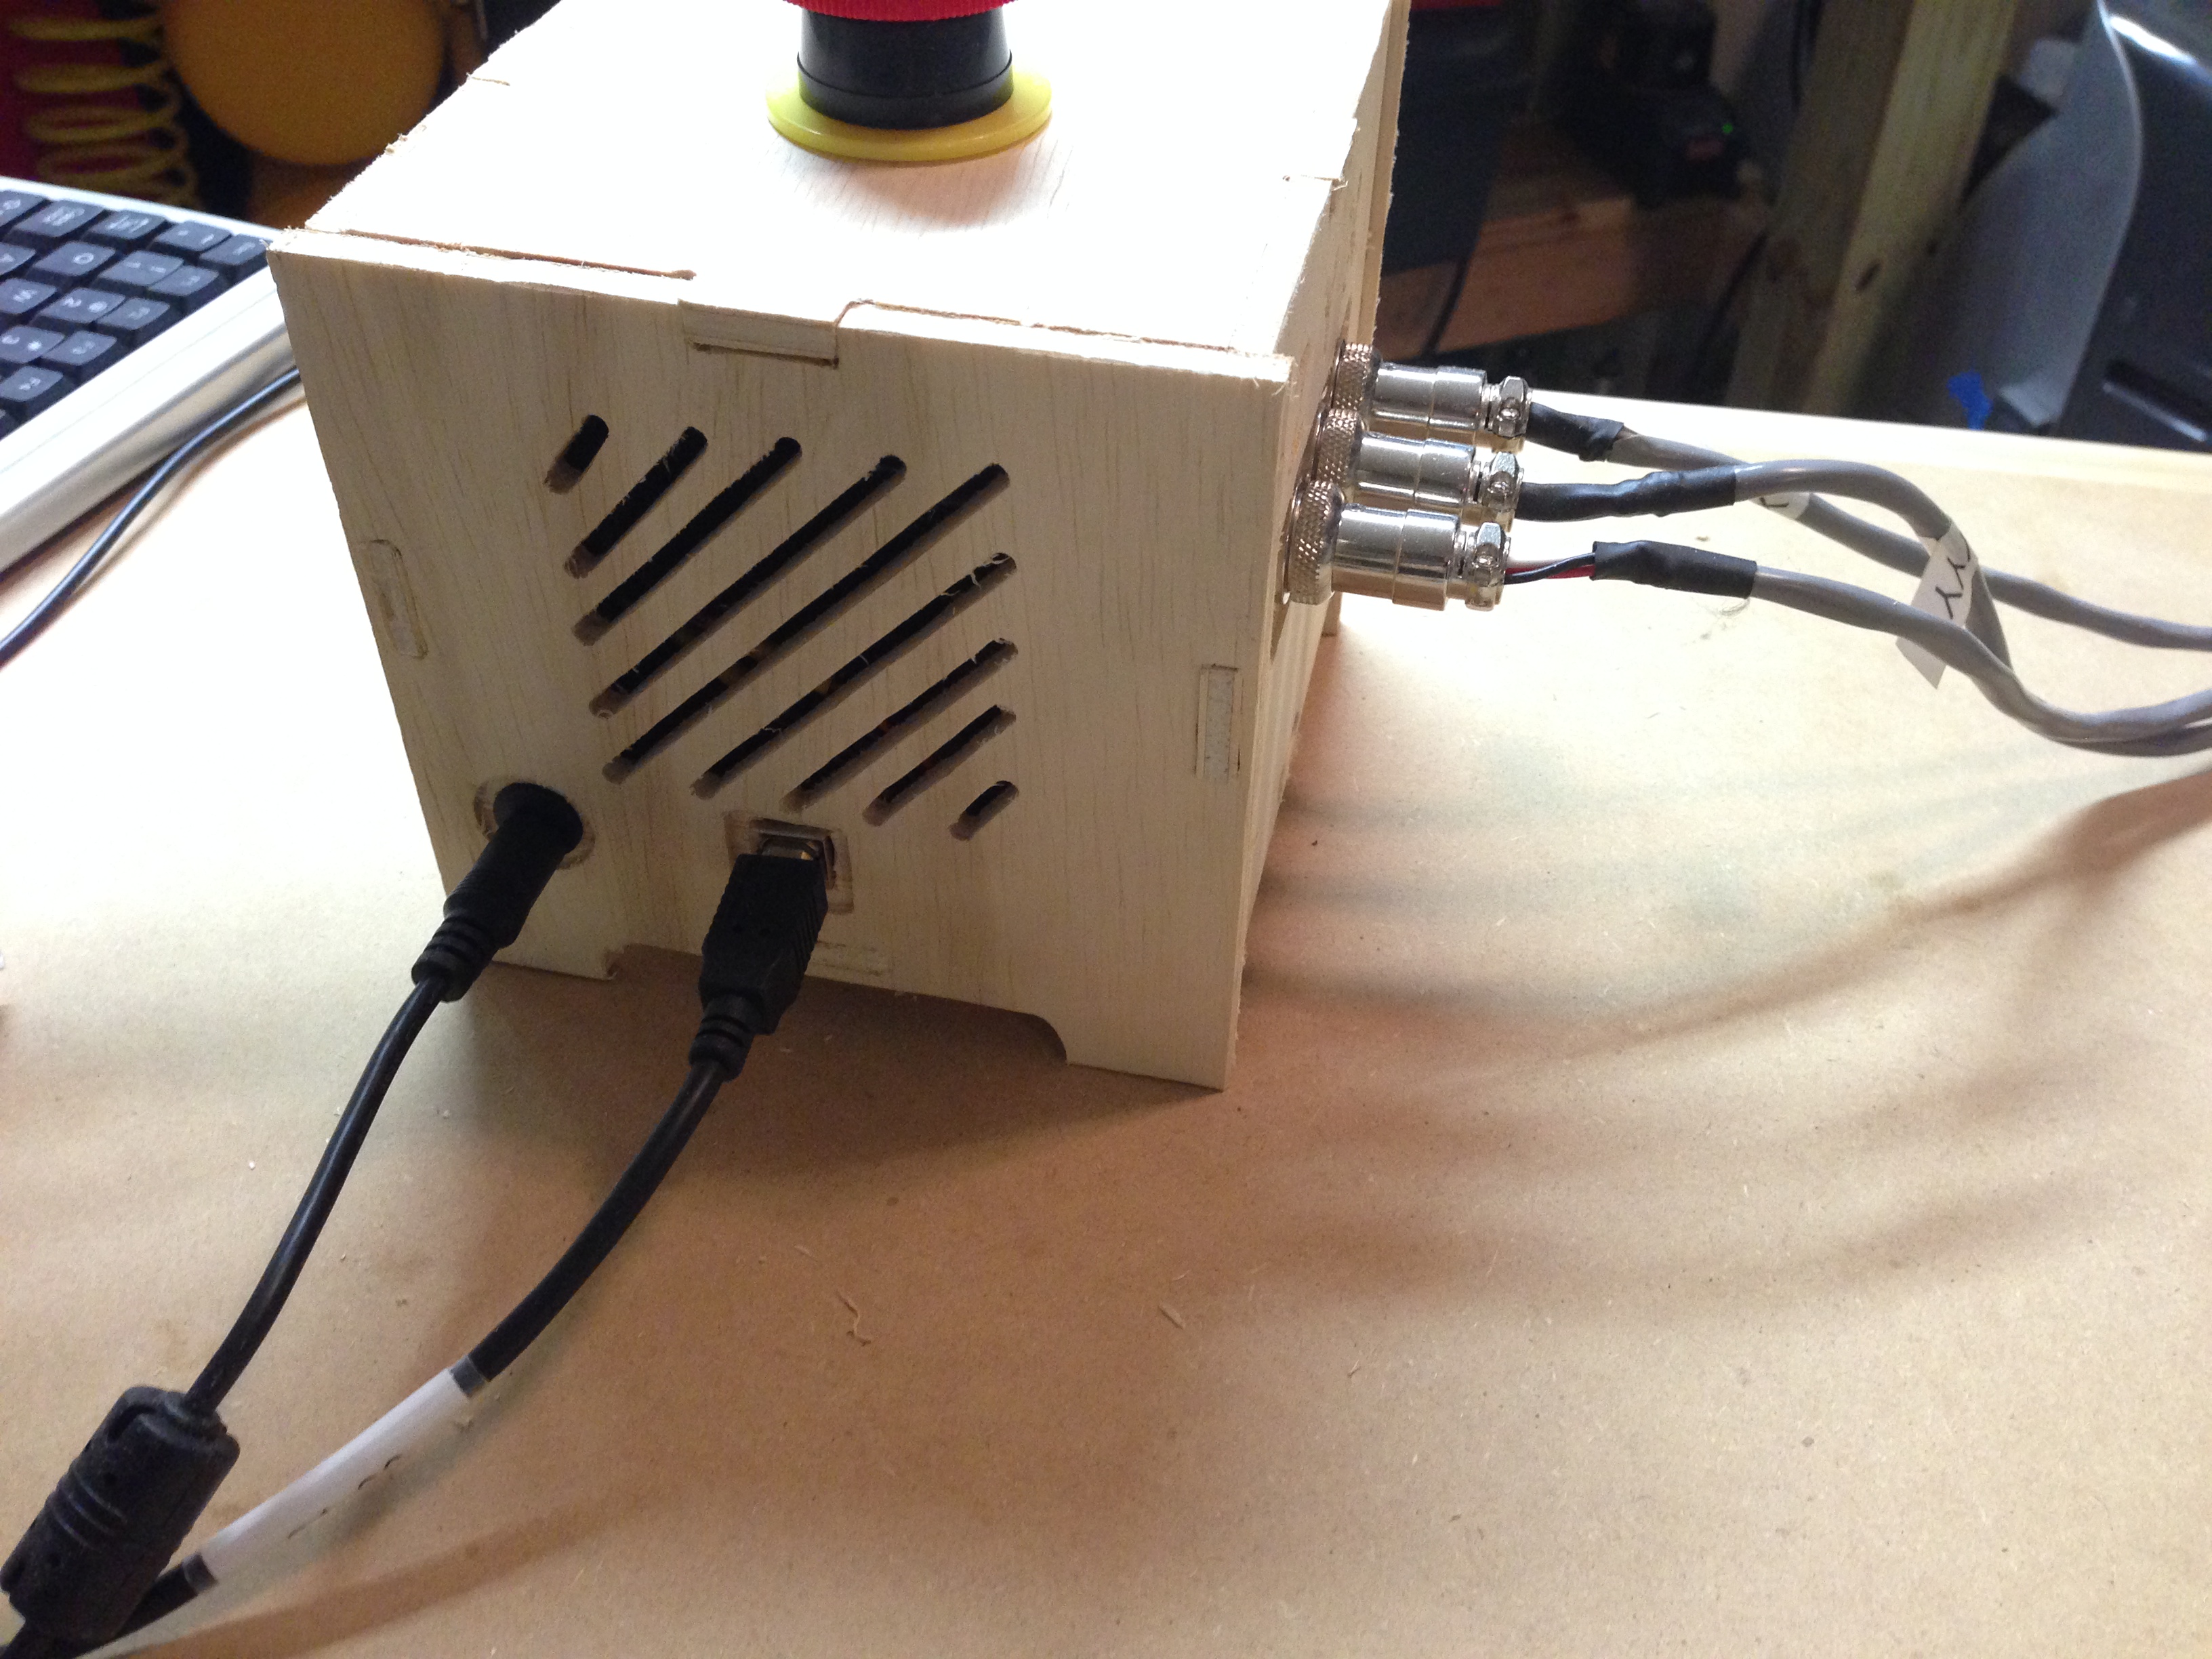
- X,Y, Z axis connections using 4pin DIN connectors http://www.ebay.com/usr/asunriseast
- 60mm 24v brushless computer fan http://www.ebay.com/usr/beststuff.626
- DC power jack socket with screw nut http://amzn.com/B00CKLZHMI
- Emergency switch, self-locking http://amzn.com/B0052RONHW
- M3x10mm 6mm male-female nylon standoffs for Arduino
- M3x40mm socket cap screws and locknuts for fan http://www.ebay.com/usr/mjmnational
The source SVG and gcode files can be found at: http://www.thingiverse.com/thing:256867
In hindsight I would have added a power switch to the design. I’ll probably go back and modify a panel with a cutout for a switch.


1 Trackback